Monday, October 19, 2009

How to add digg this in blogspot

The Digg This button is for website and blog publishers that want to encourage their audience to submit or digg their content on Digg. To expose content to the Digg community adding a diggthis button is a great feature.
To add digthis button :
1. Go to Blogger Dashboard after you login as the administrator.
2. Go to Layouts.
3. Click 'Edit Html'.
4. Put a tick mark (check the expand widgets templates on) in Expand Widgets Template box at top of Edit Template text box and scroll down to the blog posts widget body to this line :

digg_url = '';
digg_title = '';
digg_window = 'new';

http://digg.com/tools/diggthis.js' type='text/javascript'/>

(If you can't find this line in the html code then press CTRL+F and paste "" . now you should find the coding line to edit)

5. Add the following lines of code into the template before the line of located above:

digg_url = ''; digg_title = ''; digg_window = 'new';

6. Now you need to create CSS style for Digg this button.
Find the following line :

]]>

7. If you want to have digg button on the left side of post, append the following lines of code into the template before the line of ]]> located above:

'#digg { float: left; margin-right: 5px; }
If you want to have digg button on the right side of post, type
float: right; instead of float: left; lind for the above code segment. 8. Save your template and now you should have DIGG this feature in your blogspot blog.


Read more...

Friday, October 16, 2009

How to Enable Clean URLs in Drupal for WAMP server

If you are running WAMP server for your Drupal 6.x installation then, the default configuration for the WAMP server doesn't not support the "Clean URLs". To enable the Clean URLs you need to change a setting in httpd.conf file. Go to wamp\bin\apache\apache2.2.8\conf folder and open the httpd.conf file with wordpad/notepad. Find the line #LoadModulerewrite_module modules/mod_rewrite.so in this file (in notepad press CTRL+F and write mod_rewrite and the line will appear. Omit the starting # (comment symbol) and save the file.

Now restart all the WAMP server services and go to Clean URLs option under Administrator--> Site Configuration in your Drupal installation. Click the Enable radio button and save configuration.

Read more...

Thursday, October 15, 2009

How to remove "Just another WordPress.com weblog" from wordpress blog header


If you have a wordpress blog then look at the header section of your blog and if you have not already changed the default tagline then it says : "Just Another WordPress Weblog".
To change or remove the default tagline of your wordpress blog :

Go to
General Settings of your Wordpress Blog's Dashboard. Then on the right hand side find "Tagline" and change it.

Read more...

Wednesday, October 14, 2009

How to enable Regedit / Show Hidden Files Option / Windows Task Manger back when disabled by virus

If Your PC is infected by FolderHTT or similar virus, it disables the REGEDIT, Show Hidden Files option under Tools option and even Task Manager. You can bring those utilities/ options back manually.

Enabling REGEDIT :
When your 'Registry Editor' is Blocked by the virus and you try to open it by typing "REGEDIT" in the run, then you will get an error message like "Registry Editing Has Been Disabled By Your Administrator". There are 2 ways to enable this again :
-- > Way 1:
1. Go to run then type gpedit.msc and press enter.
2. Now Click on Administrative Templates & click the System and locate the Prevent access to registry editing tools and double click on it.
3. Click disabled in the option button and click apply and then ok .
4. The disabled button will make the policy into default, the computer will automatically configured it and you would be able to access the regisrty.

-- > Way 2:
1. If you are not able to open or use gpedit.msc, then select all the codes in bold font below.
REG add HKCUSoftwareMicrosoftWindowsCurrentVersionPoliciesSystem /v DisableRegistryTools /t REG_DWORD /d 0 /f
2. Copy and paste it the Run window and hit enter. This code will enable your Registry Editor.

Enabling Show Hidden Files/Folder option :
1. Go to Run than type regedit and press OK.
2. Find the key:
HKEY_LOCAL_MACHINESOFTWAREMicrosoftWindowsCurrentVersion
ExplorerAdvancedFolderHiddenSHOWALL

3. Look at the “CheckedValue” key. This should be a DWORD key. Check its value If the value is not 1 then make it 1.
4. If “CheckedValue” key is not there then Create a new key called “CheckedValue” as a DWORD (hexadecimal) with a value of 1.

Now open My Computer, on the toolbar go to Tools > Folder Option and click on the View tab.
The “Show hidden files & folders” will work properly.

Enabling Windows TASK MANAGER :
1. Open Group Editor Policy by Clicking on Start--> then click Run --> type gpedit.msc and hit Enter.
2. In the Group Policy Editor, expand in turn: User Configuration--> Administrative Templates --> System -- > Ctrl+Alt+Del Options.
3. On clicking Ctrl+Alt+Del , you will have four option on right hand side. Double click on Remove Task Manager to change its setting:
4. Click on Not Configured and then OK and Task Manager will be available once again.


Read more...

How to secretly insert another file in a .jpg/.jpeg/.gif file.

There are some software available to secretly add any file (text files, Office documents, video clips, pdf, mp3, zipped files, webpage, .exe, .bat, .reg or any other file format) inside a jpg, gpeg or gif file. But Ain't it great to do this without any software. Because there might be situations where you don't have the internet access and the software to do it, but you need to do it manually!!!

To add any file hidden inside a .jpg/.jpeg/.gif image file :

1) Zip the various files into one .rar file you want to add with the image file.
2) Pick any jpg/gif picture of any size and Dimension.
3) Copy the two Files(.rar and image files) in the same directory (same Drive & Folder). For Example: Copy the file in D:>\new folder.
4) Now open the Command prompt window ( by typing cmd in run window or by clicking start-->All Programs--> Accessories--> Command Prompt .
5) In Command Prompt go to the destination folder. In this case D:\ New Folder and press enter (as our rar file and image are saved in D:\New Folder directory)
5) Type the following command now :
copy /b image-name.jpg + collection.rar my-image.jpg
( assuming your image name is image-name and the .rar file name is collection.rar and you want your image to be named my-image.jpg now)

In the same way, You can hide other files like videos, mp3 and other secret documents too.
Just Zip all the Files into Single rar files and Follow the above Steps.


Read more...

How to Remove ads from Yahoo Messenger 8

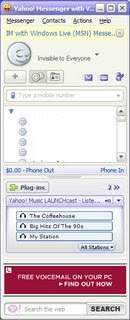
Yahoo Messenger shows ads by default and this feature might be so irritating for some users. If you want to remove the ads shown in your yahoo Messenger then follow the methods described below:

==> Remove the BIG AD from the Main yahoo! screen, where we see our Friend List:
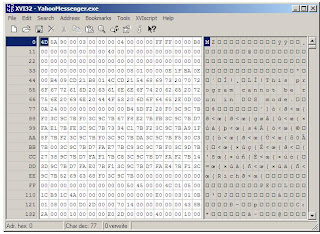
1) Open “%Programfiles%\Yahoo!\Messenger\YahooMessenger.exe” file into a Hex Editor. There are lots of cool! & free Hex Editor available for download but if you want to download from here click HEX EDITOR(XVI32). or
click HEX EDITOR(Hex Editor32) .
2) Goto the offset 3981AC and change the string “enabled” to anything you want.

==> Remove other ADs like in chat window, webcam, etc.: 1) Open notepad and paste the following code:

Windows Registry Editor Version 5.00
[HKEY_CURRENT_USER\Software\yahoo\pager\YUrl]
“First Login Beacon”=”*”
“Tutorials”=”*”
“Messenger Help”=”*”
“Voice General Help”=”*”
“Change Room Banner”=”*”
“Address Book”=”*”
“Finance Disclaimer”=”*”
“Messenger Ad”=”*”
“Chat Adurl”=”*”
“Calendar Alert Ad URL”=”*”
“Conf Adurl”=”*”
“Mail Alert Ad URL”=”*”
“News Alert Ad URL”=”*”
“Personals Alert Ad URL”=”*”
“Stock Alert Ad URL”=”*”
“Webcam Viewer Ad Medium”=”*”
“Webcam Viewer Ad Big”=”*”
“Webcam Viewer Ad”=”*”
“Webcam Upload Ad”=”*”
“Chat Transition Ad”=”*”
“N2Phone Adurl”=”*”
“Webcam Viewer Ad Bid”=”*”

Now save the file as yahoo.bat and click to run.


Note that : Use this .bat file only if you are running NTFS file system. In FAT 32, this might disable some other useful feature of messenger.


Read more...

Tuesday, October 13, 2009

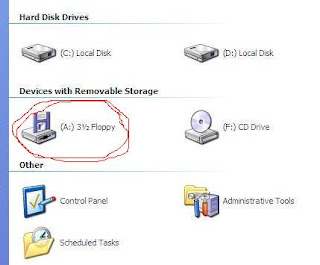
How to remove Floppy drive(A:) icon from My Computer

The floppy drive (A:) icon can appear in your My Computer even if you don't have a floppy drive attached in your System Unit. If you want to remove this icon from your my computer then :
Right click on My Computer icon--> click Properties--> Goto --> Hardware Tab and click--> Device Manager.

In the Device Manager Window you'll see a Floppy Disk Controller. Click it and there will appear another icon below it which named "Standard Floppy Disk Controller". Right click here and click Disable.


The Floppy Disk Icon will no longer appear in your My Computer Window. You can Disable the Floppy disk Controller option disabled from your BIOS Settings too.

If the Floppy Drive Icon comes back with the restart of your PC then instead of Disabling the Standard Floppy Disk Controller Uninstall it from the Device manager Window.

To get back the Floppy icon in My computer Just go to Device Manager and Enable the Standard Floppy Disk Controller option.

Read more...

Wednesday, October 7, 2009

How to rename start button in windows XP


It's really great to be able to rename your Start button of Windows XP and Giving a name you like ( Probably your name). To do so you just have to follow the following 2 steps:

1. Edit the explorer.exe in C:\windows\explorer.exe &
2. Tweaking the registry to accept the changes.

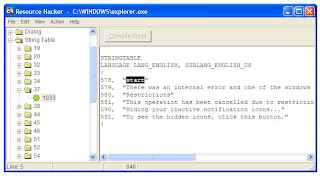
--> Since Explorer.exe is a very important file for your windows XP to run, make a copy of this file and paste it to some other place before making any change to this file. Because we are dealing with a binary file (.exe file) , we need to use a binary file editor like "Resource Hacker". It is a free program available for download from Softpedia. Once you have downloaded it, extract all the data from the archive and run ResHacker. Now open the explorer.exe with the downloaded software. Alternatively you can use any reliable binary file editor or hex editor software you like.

In the left, you can see an information tree. Expand String table (Under String Table) > 37 or 38 (37 string is for the normal XP layout and 38 one is for the classic layout). You just select the one suitable for your Windows and then select 1033. In the right, line 578 display Start between quotes. Rename it with the desired name (I've remaned it Xero) and then click the Compile Script button which is placed above.


It's time to save the new version of the explorer.exe. Click save as from the file menu and save it with a different name. I chose My-Explorer.exe.

-->Now Goto Start--> Run and Type "regedit" to open the registry editor. You can alternatively open the registry editor by browsing C:\windows and then clicking the "regedit.exe" file.

Browse "HKEY_LOCAL_MACHINE --> SOFTWARE --> Microsoft --> Windows NT--> CurrentVersion --> Winlogon " from the regedit window and from the right find the "Shell" entry. Double click on it and replace explorer.exe with my-explorer.exe (or whatever you renamed the edited file in your case).


Close the registry editor and Restart your computer. After Windows XP boots, the new start button will have the name you have chosen ( Xero for me).

Read more...

Friday, October 2, 2009

How to remove iframe virus

What is iframe : iframe is an inline frame which places another HTML document in a frame inside a normal HTML document, which was first introduced by Microsoft in the year 1997. The iframe tag is now widely supported by all visual browsers. Unlike an object element, an inline frame may be the "target" frame for links defined in other elements and it may be "selected" by a browser as the focus for printing, viewing HTML source etc.

The opening iframe tag must be closed by /iframe both with in tag < > syntax . Content between the iframe tags is used as alternative text to be displayed if the browser does not support iframes.The iframe element is invalid in Strict DTDs, and in XHTML version 1.1. Inline frames have, at times, been exploited to illicitly inject code into a website.

iframe injection is the virus which will be created in index.php, and other .html, .php , .asp etc files.

A sample iframe virus code might look like iframe src="http://superbetfair.cn/in.cgi?income43" width=1 height=1 style="visibility: hidden" /iframe.

First these iframe virus codes will be injected in index.php files. They will be placed at end of code. And minute by minute starts to delete the code. from rear end. So, your site will not be displayed, and you can see the message like ‘ unknown character found in …./index.php on line .... And it will avoid you to access the log in page also. The iframe virus uses very small frame to insert unexpected entry. If your site is infected by iframe virus you and anyone else won't be able to browse this specific pages and will get a warning message from google/Mozilla like this:


To remove iframe virus from your site follow these steps:
1. Backup everything including database and download these files as a .zip file to a clean computer.
2. Reinstall your Windows OS and remove the trojan from your computer using a antivirus.
3. Clean your code removing all iframes and jscript code that have been inserted by the trojan.
4. Check you databases and remove suspicious code from there too.
5. Change your FTP password and reinstall the FTPClient software.
6. Upload the cleaned version of your website and database.
7. Change the all infected / index files PERMISSIONS as 444, so that it can not be writtenable.

It is important to note that, the attack is caused by a trojan that resides in your computer ( either from removable devices like your music player or pendrive or from the infected websites you have visited ) and steal your ftp credential and adds codes to your website file. Since this trojan stoles all your FTP credentials ( and are used to access your site accounts and modify your code, inserting an iframe in some cases or in other cases, these kind of virus insert a compressed javascript code. So to be safe for the future you must change your FTP account password. Never use the FTP software for a long. Rather try to reinstall it time to time.

Read more...

Thursday, October 1, 2009

How can I clean up my computer history

Cleaning the Computer history (searched items, recently opened documents & files etc.) is sometimes important to protect your privacy. To clean the history of your computer :

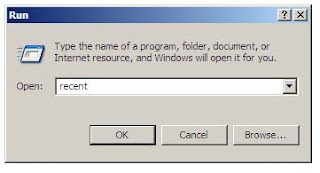
1) Go to Start--> Run--> then type "recent". This will open a window containing shortcut of all the recent files that had been accessed. Select all and Shift+Delete those files. Deleting these files doesn't affect your original files, so don't worry about it.


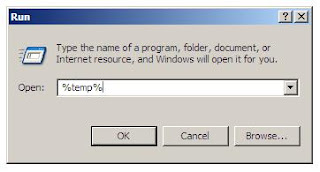
2) Go to Start--> Run--> then type "%temp%". The opened window will show all the temp files. Delete those files and then from recycle bin too. Don't worry if a some files can't be deleted. These files will be left because your Operating System is using them.

3) Now restart the OS and your history is cleaned up.

Read more...

How to Download Youtube Video

Youtube doesn't allow users to save/download the videos from their website. It only allows users to send a hyperlink to others and invite them to go to youtube.com website to view the videos. But there are different reasons some want might want to save the video in the HDD or in a portable device.
There are 3 different ways to download youtube or similar video sharing website's video.

Option 1 (From websites) :
There are many websites that have a youtube video download option in their websites.

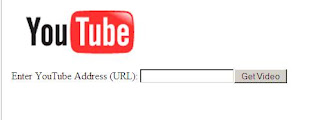
Simply copy the url of the video you want to download from the youtube.com website and enter it in the third party website's Get video text box. Then click Get video to download the desired video.
Here is a list of websites that offers youtube video download option in their website. Yo ucan find some other websites just by googling . Bookmark the best site(s) so that you don't have to search for the websites again.
-- http://www.savevideodownload.com/download.php
-- http://www.downloadyoutubevideos.com
-- http://keepvid.com
-- http://javimoya.com/blog/youtube_en.php

Option 2 (Using Desktop software) :
There are different free software available to download and install to get the youtube video. These software are small and easy to install. Enter the url in the software's download interface and download the youtube.com video in your computer.
Here are some links to such software. You must understand that youtube.com frequently changes their vedeo sharing techniques to prevent the third party software to download the video locally. So the software works pretty fine might not work at all tomorrow. But there are always options like downloading the updated software or getting the newer versions available.
-- Easy Video Downloader
-- Youtube downloader
-- ImToo download youtube video
-- Youtube download 3.14
-- Xilisoft Download YouTube Video
-- YouTube Downloader 2.5.1
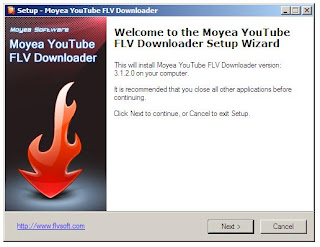
-- YouTube FLV Downloader

Option 3 (Using Mozilla Firefox Extensions):
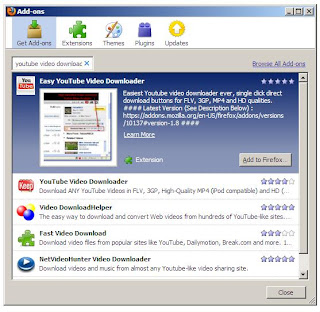
Mozilla Firefox offers so many extensions/AddOns to enhance the core functionality of the web-browser. To download any AddOns/ extensions open your firefox browser (If you don't have a firefox browser download it from http://www.mozilla.com/en-US/firefox/personal.html ) and go to Tools menu--> AddOns--> Get Addons 'Tab' And in the searchbox type "youtube video download". A list of available Addons will be appear in the result box.

Select the AddOns fro mthe list and click "Add To fireFox". After installing the AddOns you will see an icon at the browser and click here to get the download environment. You can Add different Youtube video download AddOns at a time. Keep the best one and then remove others as you like.

The youtube video are stored in .flv file format. So while downloading either convert it to the common file format like .mpeg or get a flash player to run these downloaded video.There are lots of free and quality .flv player available to download.

Go to http://www.flvsoft.com/download_flv to download a free flv player. Gom player is a very popular player which can run lots of different video files including .flv files.Click GOM( http://www.gomlab.com/eng/GMP_download.html ) Player to download it.


Read more...

Wednesday, September 30, 2009

How to shutdown Computer over network

Shutdown Your PC over Network :
You can simply go to the computer on the network through the command prompt ( to open command prompt start--> run --> type cmd ) and type "shutdown -m \\computer -s" .
\\computer is the name of the computer you want to shut down. You may aslo use the ip address of the pc you want to shutdown instead of the computer name. For instance if the ip address of the pc12 is 168.147.60.4 then the command should be c:\>shutdown -m\\168.147.60.4 -s .

Read more...

How to shutdown Computer from command prompt (DOS)

You can shutdown/ restart/ log off your computer from command prompt. To open the DOS or Command prompt go to :
Start-->All Programs--> Accessories --> Command Prompt
, or
Start-->Run and type cmd .


In this Command prompt type:

shutdown -s ( to shutdown the computer. By default you'll have 30 sec. to save your running work.)
shutdown -r ( to restart )
shutdown -l ( to logoff )
shutdown -a ( to abort any system shutdown process )

Read more...

How to Enable multiple Yahoo Messenger


Normally You are not allowed to run multiple yahoo messenger at a time. But if you do a little tweak in yahoo messenger, then you can run as many yahoo messenger as you like in your computer at a time. This means that if you have 4 yahoo IDs, then you can login to 4 different yahoo messenger at a time from a single PC.

To run multiple yahoo messenger at a time :
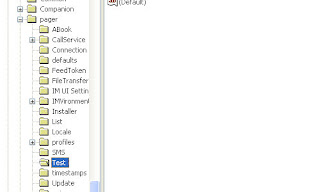
Click Start --> Run-->type regedit and press Enter
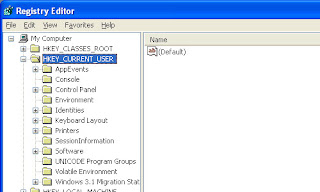
From the Left Panel Select HKEY_CURRENT_USER


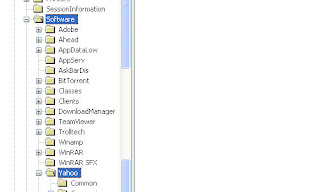
Select Software and then select Yahoo


Now select Pager and then select Test


Then, on the right pane, right click on the registry editor and select “New”, then create a new DWORD registry value. Name the new registry key as Plural, and assign it the value of 1 (decimal).

Alternatively , You can create a new .txt file and write down the following lines there :

REGEDIT5
[HKEY_CURRENT_USER\Software\yahoo\pager\Test]
"Plural"=dword:00000001
save the file and rename the .txt file to .reg file. Now double click the file and your yahoo messenger is ready to run for multiple instance.

A free and very useful utility that allows a yahoo user to run multiple instances of Yahoo! Messenger can be downloaded from here and just after installing it, the user can run multiple yahoo messenger.
To download the utility click here.

Read more...